Monthly Archives: June 2013

Quickies – cheating again

Once again, far too many days have slipped past without a post.  This is going to be a quickie, too, because Kitty and I have a table waiting at Tsuyu for some sushi – the best in Jo’burg, many say…

Two quick meals to write up, both of which provided some tasty leftovers for lunch or dinner during the week.

First up, cheating with beef olives:  All the recipe books tell you how to make your own beef olives, and, I’m sure, all the purists would tell me that DIY is the only way to go.  This, however, is about bachelor cooking – so the odd cheat here and there is the norm.  This includes beef olives, which I buy in raw, but cook in a sauce of my own making.

For those of who in the northern parts of Johannesburg, the German butchery at Deco Park, Northriding (Tirolean Meat aka Berliner Deli and Grill) supplies superb meat, including beef olives.  Trusty Woolworths also sell great beef olives.  I usually allow two per person (plus a left-over allowance), as the meal tends to be rich and filling once you factor in gravy and starch.  A great winter dish.

Earlier this week, as I continued my quest to empty out my freezer (to make room for some new leftovers, of course!), I found some beef olives hiding under a cover of frost and decided that their time had come to be eaten.  I also found some gravy left over from my last beef olive cook-out, so thawed that out, too.  As you’ll see from the following write-up, this dish managed to consume a few more leftover-survivors before I was done.

I have used Gordon Ramsay’s “Angus beef olive” recipe several times.  He makes a simple gravy using flour, tomato paste, red wine and beef stock.  This time around, however, I felt like something different – and the leftover gravy was nowhere near enough for the frost-burnt beef olives I was seeking to eradicate.  I also had some carrots and celery lurking in the fridge.  A quick Google search turned up a BBC Food recipe (http://www.bbcgoodfood.com/recipes/1157635/beef-olives) that provided the desired inspiration.

Once again, my faithful Jamie Oliver / T-Fal sauté pan was hauled onto the stove.  I put the oven onto 180C to heat up whilst warmed some olive oil in which I melted some butter, then browned the beef olives.  The trick, I think, is to brown them quickly, but not at too high a heat, in the hope that they will not become tough (fat chance with this frosty survivors, sadly).  Whilst the beef olives kept warm in a casserole dish, I first fried up some bacon pieces, then sautéed some chopped carrot, celery and onion.  I’d also found some dried porcini mushrooms hiding in the fridge (yet another chance to clean out the appliance), and put them into some warm water to reconstitute.

Once the vegetables had softened a bit, I lobbed in half a tin of jam tomatoes (yet another find from the freezer compartment) and a big squeeze of tomato paste, and let things simmer a while longer.  I mashed up the tomato pieces, then added some glugs (very scientific measurements, these) of fine red wine and beef stock.  That was followed by the now-soft porcini mushrooms, as well as the water they had been soaking in.  A few more minutes on a low simmer, some salt and freshly-ground black pepper, and things were tasting very good indeed.  If I was going to leave the sauce as-is, I would probably have added some mustard earlier in the process.  This time around, however, I had that leftover gravy to use, so lobbed that into the pan to warm through. It already had some mustard in it.

Once the oven was up to temperature (180°C), I poured the gravy over the beef olives in the oven-proof casserole dish, put the lid on and popped it all into the oven for 20 minutes or so.  It was all rather delicious over some plain basmati rice, washed down with the remnants of the bottle of red wine that I’d opened to make the gravy.  I liked the slightly chunkier gravy, with the cubes of carrot, celery, onion and bacon.  Some recipes I saw online suggested pureeing things to get a smoother gravy, but I don’t think that would be necessary.  I enjoyed the remaining beef olives, rice and gravy for lunch today (no wine, sadly), sitting outside on the patio enjoying the winter sun.

The second dish I cooked recently (last Sunday, to be precise, although the preparations were made on Saturday) was Chicken Yassa.  Google tells me that Yassa is a West African dish – originally, it seems, made with monkey!  The Chicken Yassa recipe that caught my attention, however, was at the back of my Larousse Gastronomique (yet another epicunary gift from Kitty).  Of course, I could not bring myself to follow the recipe exactly, so made a tweak or two – and, when I repeat it, I will make further changes.  Google, again, informs me that there any number of variants on the theme.

Given that I had no monkey (not something normally found on the shelves at Woolworths, unless it is someone’s ill-bred and ill-behaved loin-spawn…) and I did not feel like jointing a whole chicken, I cheated (again, as usual, как обычна) by using chicken portions.  I had some chicken drumsticks and wings lurking in that freezer I somehow never manage to empty, and bought some fresh thighs and drums to extend the quantity (I think I cooked 2 thighs and 4 each of the drums and wings).

I had some fresh limes lurking in the fruit bowl, so zested and juiced 3 of them.  The juice plus some of the zest went into the mixing bowl (the original recipe did not call for zest, but I feel that it adds a spark to dishes) along with a glug of peanut oil, two chopped chillies (again, a not-so-slight increase on the recipe’s quantity), salt, freshly-ground black pepper and three onions, sliced.  Next time around, I think that only 2 onions will suffice.  I sliced them into rings but, next time, I would halve them before slicing, or cut them across the rings into little wedges (much like one would cut them for Thai cooking, or stir-fries).  I think that, next time, I might add a crushed clove of garlic, too.

I put the chicken pieces into a large freezer bag, inside a bowl, poured in the marinade, then squeezed out the air and knotted the top of the bag.  The bowl with the bag of marinating chicken went into the fridge around lunchtime on Saturday, and sat there until Sunday lunchtime.  Every few hours I would work the bag and move the chicken pieces around, ensuring that everything got covered in the marinade.

On Sunday, I lit a fire in the Weber and let burn down to a nice set of hot coals, then emptied the contents of the marinade bag into a colander over a bowl.  I picked out all the chicken pieces, which I browned over the coals of the fire.  Importantly, you’re not aiming to cook the chicken all the way through – you’re just aiming to brown the skin and impart that lovely, smokey fire flavour to the meat.  The onions went into that reliable T-Fal sauté pan, with a little oil, to soften and brown, and the marinade went to one side.  Once both the chicken and the onions had browned, they were reunited in the pan, along with the marinade.  The lid was popped on and they were all left to simmer for 20 minutes or so, whilst the rice finished steaming.

Lunch was then served: the chicken pieces placed on a bed of steamed basmati rice, with the onions forked on top and a few spoonfuls of the sauce poured over the whole lot.  Delicious! (the leftovers served as dinner during the week).
Bits and pieces – catching up

It’s again been a while since I last found / made the time to try and catch up with the many notes I have made of ideas for this blog.  This posting comprises a number of bits and pieces, covering various meals and dishes, some of which I’ll write up in detail in separate posts.

I’m writing this late on Sunday afternoon, outside on my patio enjoying the last of the winter sun’s warmth.  Johannesburg has superb weather in winter, but it can be a little chilly. Lunch today was some of that soup I wrote about in my last post, “Winter food – time for soup”, jazzed up with some of Dave’s Devil Juice (more of that shortly), and a slice or two of the focaccia bread I made yesterday.

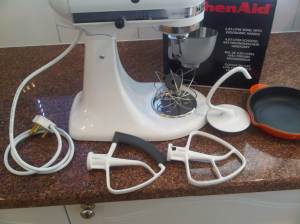
I spoilt myself earlier this week and bought a KitchenAid mixer.  Until now, I have made do in the kitchen with a liquidiser, an old food processor (with a few slicing / chopping blades), a handheld mixer and a mini food processor (very useful for preparing sauces or chopping up a handful of ingredients).  I had been wanting to make bread for a while and had tired of all the hard work in making pasta dough, so wanted a machine with a dough hook that could do the hard work for me.  I also wanted to get back into baking, which I had largely ignored since my childhood (when I learnt to bake out of sheer desperation, because my mother was not that good at baking cakes or anything that involved yeast or dough).

My new kitchen toy, complete with accessories

My new kitchen toy, complete with accessories

The little orange Le Creuset pan to the right of the picture was a gift from Kitty this week, as a thank-you for some DIY I’d done at her place.  I’d seen a mate using a similar small pan to make some sauce for dinner last Saturday, and had told Kitty I’d like something similar.  (I also bought myself a mandolin, which I have to even unpack, but I have some ideas for its use shortly).

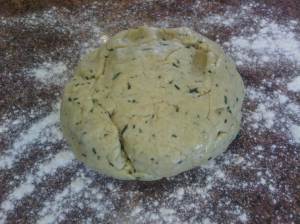
Rosemary and olive oil focaccia dough

Rosemary and olive oil focaccia dough

I put my new toy to work on a recipe for rosemary and olive oil focaccia bread, which I had seen in a recent newspaper article (http://www.iol.co.za/lifestyle/food-drink/recipes/impress-with-olive-oil-recipes-1.1530052#.Ub3ENPmno4c).  I cannot recall when I last (if ever) cooked anything involving yeast – I am sure I must have cooked with it before, but cannot recall when.  Anyway, when I saw the recipe in the ‘paper I decided to give it a bash – an expensive bash, given the cost of a KitchenAid…

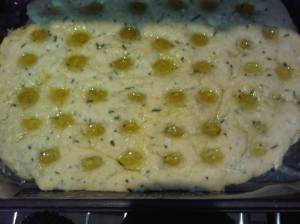
The focaccia bread, drizzled with olive oil, ready to go into the oven

The focaccia bread, drizzled with olive oil, ready to go into the oven

Making the dough was a pleasure, thanks to my new toy and its dough hook.

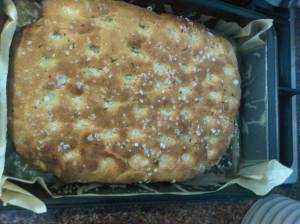
The focaccia bread, hot out of the oven

The focaccia bread, hot out of the oven


A large paint scraper or putty knife makes short work of cleaning flour off the work surface after making dough or pastry

A large paint scraper or putty knife makes short work of cleaning flour off the work surface after making dough or pastry


Here’s a tip for cleaning up after making dough or pastry:  a large flat paint scraper or putty knife makes short work of scraping all the flour and dough / pastry scraps together.


I mentioned “Dave’s Devil Juice” in my last posting, about the soup, and earlier today.  Like the soup, it is named after B’s father, Dave.  When I first met B, I enjoyed a bit of heat and some chillies, but her family introduced me to the “habit” of chewing on fresh chillies, as a quick accompaniment to a snack, or a curry, or something else needing spicing up.  Another thing they had was this fearsome chilli sauce – so hot that a mere drop or two would blow a bowl of soup up the taste-bud Richter Scale!  Dave’s recipe was deceptively simple:  a few handfuls of dried bird’s eye or peri-peri chillies, which he ground to a fine powder, mixed with Old Brown Sherry, and bottled for several months.  He would then filter the resulting flame-red sauce through a fine sieve before bottling it in a little decanter.

A bottle of Dave's Devil Juice, lurking oh-so-innocently in the sun...

A bottle of Dave’s Devil Juice, lurking oh-so-innocently in the sun…

The alcohol in the sherry extracts all of the lovely heat from the chillies.   I made some a few months ago.  Sadly, I could not get the very hot, dried chillies, so bought a few packs of fresh red chillies which I dried in the Jo’burg summer sun.

The resulting sauce, depicted alongside, is not as hot as I remember Dave’s being, but still has a superb kick.  As you can see, it is being consumed – this decanter started out full a month or so back.

Kitty and I made pelmeni for dinner last night.  B and I grew to love pelmeni when we lived in Moscow, and it was a dish we both missed after returning to South Africa.  Of course, there is no chance of finding a bag of frozen pelmeni in one of our local supermarkets, so, for the first few years after coming back, the only place we enjoyed pelmeni was during trips to Moscow.  Last year sometime I tired of that, so did some research on the ‘web, where I found a vast number of pelmeni recipes, and started making my own.  I’ll post my recipes for the dough and filling one day soon.  After I introduced Kitty to pelmeni, she also wanted to make them.  Her boys are now also big fans of pelmeni, served with “smetana” (sour cream or creme fraiche), vinegar and some chopped herbs.  She follows a dough recipe from Natasha’s Kitchen (http://natashaskitchen.com/) and has adapted my meat mixture as well.  As I said, I will write it all up in a separate posting, soon…

Last weekend I was hankering after some roast chicken.  Kitty and I were busy with a number of chores and DIY tasks across our respective houses, so we needed something that did not involve a lot of effort.  Thankfully, a charcoal-roasted Weber chicken fits the bill nicely:  cover a suitably-sized chicken with peri-peri marinade or sauce, pop it into a roasting bag, and put it into a Weber kettle braai / barbecue (using the indirect method) for an hour (cutting the bag open 10 minutes from the end so that the skin can crisp up).

Kitty also cooked dinner on Wednesday night, trying a new and tasty dish which she’d eaten previously in Egypt.  She made some small meatballs (using seasoned lamb mince, I think, with some chopped onions and herbs), which we grilled under that (in)famous TV grill.  The mealballs were served wrapped in chickpea pancakes, with spoonfuls of cucumber / yoghurt raita or tzatziki.  Very yummy indeed, and certainly a dish to be repeated.

Another new dish I tried during the week was pilau rice.  I did cheat, however, as I used a pack of pilau seasoning that I’d bought from Woolworths some time before.  I made a half-batch, to try, and quite enjoyed it.  When I cook it again, however, I think I’ll saute some onions, perhaps some peppers, and definitely some chilli to put into the mixture before adding the water.

Something else I’ve eaten recently is sweetcorn, on the cob.  Boil them for 8 to 10 minutes, slap on some butter and sprinkle on some salt, and eat with your hands – preferably in the sun somewhere.  Lovely as a quick lunch or snack – and my kids love it, too.

I have taken so long to write this post that the sun has gone down, it has got distinctly colder, and I have retreated indoors, where the fire is now lit and the sherry bottle is calling.  I still have lots to write about, so will put up another post or two during the course of the evening (hopefully).

Before I go, a punt, if I may, for my favourite Japanese restaurant – one which many rate as one of the best, if not the best, Japanese restaurant in Johannesburg – Tsuyu, in the Pineslopes Shopping Centre in Fourways.  Roger and Sandi run a small but great operation.  Their sushi is excellent and their teppanyaki table turns out one treat after another.  Find them on Facebook at https://www.facebook.com/tsuyu.za?hc_location=stream.  When B and I lived in Moscow, we would fantasize about the Tsuyu sushi, and made a point of going there on every trip back to SA.


Winter food – time for soup

I’m not sure where the past 2 weeks or so have disappeared to, but, in spite of my best intentions and many notes about the various dishes and meals I have cooked, I somehow failed to post anything on this blog.  I hope (those intentions again) to rectify that over the next 2 or 3 days…

As a kid, I was never a fan of chunky soups – I preferred my soups thin and without too much “gunk” in them.  There is probably a link there to my simultaneous dislike of all manner of cooked vegetables (excluding potatoes, of course, which I love in many forms – chips / fries, crisps, roasted, oven-baked, mashed, salad, gnocchi – you get the picture).  Whilst I am still not a fan of cooked vegetables, I have come to appreciate heartier, chunkier soups.

Another recipe I acquired from B is what we call “Dave’s ‘vegetable’ soup” – based on the soup her father makes regularly and keeps in a plastic (Tupperware) container in the fridge. ‘Vegetable’ in quotes because, more often than not, it has some meat in it to add flavour.  My version of it most certainly has meat in it – as well as “meat” stock cubes or powder – which may or may not have any form of animal product in them at all, if some of the recent press articles are to be believed.

I have been meaning to make soup for a while now, as the weather has got colder and I have looked for something decent and easy to eat for lunch.  A day or so back I finally decided to do something about it, and stocked up at the supermarket:

  • Some “soup meat” – beef or lamb shin works well, as the meat is full of flavour and the bones can go into the soup, too (see below) – not much is needed; for my latest batch, I bought 2 packs which each held 2 thin slices of beef shin
  • Some veggies – cabbage (¼ head, max), carrots (2 or 3), celery (2 or 3 stalks), onion (1), potato (1 large), turnip (2)
  • Lentils (red or black, or both), pearl barley – about a ⅓rd of a cup of each, or 1 cup in total
  • Some herbs – oregano, thyme, bay leaves
  • Stock – ideally some home-made stock that has been lurking in the freezer, but commercial cubes, powder or liquid will do (the equivalent of 2 or 3 cups or cubes)
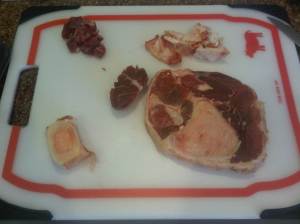
Trimming the soup meat - use a sharp deboning knife

Trimming the soup meat – use a sharp deboning knife

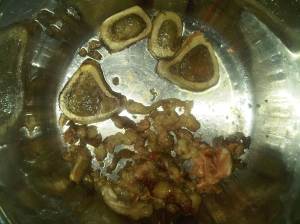
Brown the trimmings from the soup meat along with the bones - it all adds flavour

Brown the trimmings from the soup meat along with the bones – it all adds flavour

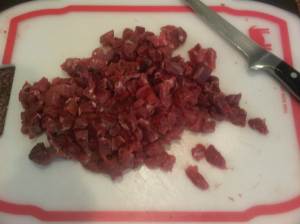
My neatly cubed soup meat

My neatly cubed soup meat

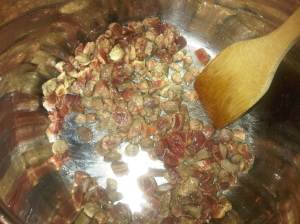
Browning the cubed soup meat - briefly

Browning the cubed soup meat – briefly

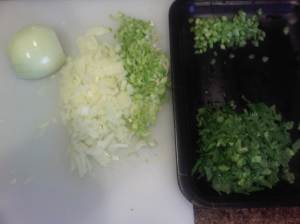
Finely chopped onions and celery - you can also add the celery leaves

Finely chopped onions and celery – you can also add the celery leaves

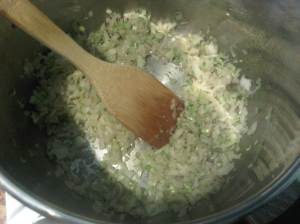
Softening the chopped onion in the fat from browning the meat

Softening the chopped onion in the fat from browning the meat

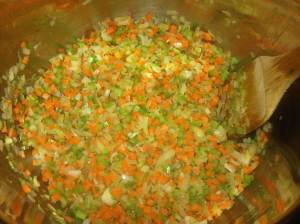
Softening the other root vegetables - carrots, turnips, potatoes

Softening the other root vegetables – carrots, turnips, potatoes

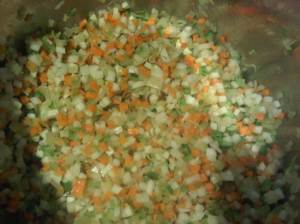
Softening the other root vegetables - carrots, turnips, potatoes

Softening the other root vegetables – carrots, turnips, potatoes

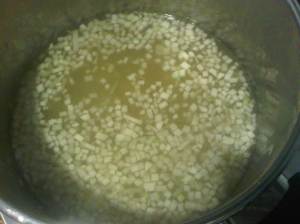
Stock added to vegetables and meat

Stock added to vegetables and meat

Put the meat and the bones back into the vegetable mix - along with any juices!

Put the meat and the bones back into the vegetable mix – along with any juices!

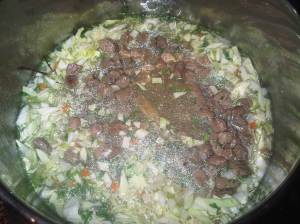
Everything in the pot - time to put the lid on and get the pressure up.

Everything in the pot – time to put the lid on and get the pressure up.

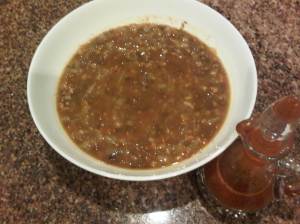
A bowl of the finished product - with chilli sauce on standby

A bowl of the finished product – with Dave’s Devil Juice on standby

I use a pressure cooker to make the soup, as it speeds up the cooking time – useful when you add lentils and barley to the mix, or tougher cuts of meat.  Whenever I use it, however, those in the know (B and Kitty, mainly) tend to steer clear of the kitchen for fear of being engulfed in a domestic accident.  Although we have quite a good brand or pressure cooker, it has a nasty habit, when used on the high pressure setting and being warmed up, to “pop a gasket” with a bang and a hiss, and to blow steam and boiling stock, soup or other fluid all over the stove (at which point B has been known to let rip with a scream as she exits the kitchen…).  Once it has done that once, thankfully, the lid and the body seem to be aligned and it usually settles down to cooking as it is supposed to, and to relieve any excess pressure through the proper valves rather than via the pressure-relief slots around the edges of the lid.

The meat and the vegetables need to be cut into little pieces or shredded with a food processor.  If you do everything manually, with a knife, as I like to do (I find it strangely therapeutic to have a large, well-balanced high quality kitchen knife in my hand, and to chop defenseless vegetables into little pieces…), it helps to cut everything in advance, before you start cooking.  I find that a knife allows me to cut everything into similarly-sized little dice.  The smarter way, of course, is to simply use a food processor with a shredding blade – the resulting soup tastes just the same, even if the pieces look slightly different!

I start by trimming the meat – I separate all the decent meat from the surrounding fat, sinews, bones, etc.  I love my Wusthoff de-boning knife, which I keep razor-sharp for just this sort of activity. Being an “anal accountant”, as I have been both fondly and otherwise described, with smatterings of an obsessive-compulsive disorder (so I am told, similarly fondly and otherwise), I like to cut my meat into nice, regular little pieces so that it is nicely distributed across all the servings.  Whilst I trim the meat, I lob the trimmings and bones into the pot or pressure cooker over a low heat, so that some of the fat can render out.

Once you have chopped the meat up (and the onions, carrots and celery), remove the bones, fat and other trimmings from the soup pot.  Keep the bones, because they go back in later, but dispose of the trimmings (into the dog, if you have one, otherwise the bin…).

Fry the meat pieces in the hot fat, but quite quickly / briefly – enough to add colour, but not long enough to remove all the meat juices and make the pieces tough.  Remove the meat pieces and keep them with the bones, to go back in later.  Add the chopped vegetables, starting with the onions and celery, which can be sautéd in the juices and fat from the meat, then the carrots, turnips and potatoes. The fresh herbs and the shredded cabbage go in next.

I found several little containers of beef and lamb stock in my freezer – which, of course, I had made some time before, when I had bones or meat to use for stock.  I defrosted those and put the stock into the soup, along with a stock cube or 2 (beef, lamb or vegetable – you choose).  You need to taste the soup once it has cooked for a while to see if any more flavour needs to be added.  Don’t add salt until the very end, however, as the stock will have lots of salt in it already.

Add the liquid stock, or soften the cubes / mix the stock powder in boiling water, and add that to the vegetables in the pot.  The browned meat cubes and the bones can also go back in at this stage.  Add the lentils and / or pearl barley, if you wish, and add more boiling / hot water (depending on how much fluid you want in your soup and on the capacity of your pot)

I don’t usually put fresh tomato into the soup, but you could certainly do so.  What I did add to this batch of soup was some tomato paste, which lifted the flavour very nicely (thanks, Kitty, for the suggestion).  If you want to add things like garlic or ginger, you should do so upfront, with the onions or the meat, to soften the harsh flavours.

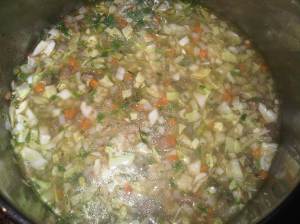
Once all the ingredients are in the pot and you are happy with the volume of liquid, it is time to let it simmer away, or to put the lid on the pressure cooker and let it hiss away.  I did not feel like battling the spitting monster cooker, so left it on the low pressure setting and just cooked for longer.  30 minutes on high should be fine (from when the valve pops up), but I gave this lot about 90 minutes on low.

Once cooked, turn the heat off, check and adjust the seasoning, and let things cool.  If you threw in a handful of thyme (as I did), you’ll need to fish out the stalks, along with the bones.  I put the whole pot into the fridge overnight, after which it was easy to skim off the fat that had risen to and solidified on the top of the mixture.  This batch needed a little more depth, so it went back onto the stove to warm up, after which I added another stock cube and the tomato paste I mentioned earlier, and cooked it a while longer.  All that remains now is to put it into plastic containers, some of which will be frozen for meals over the next few weeks, whilst the others will serve for lunch sometime this coming weekend.

The soup is delicious by itself, or with some fresh, crusty bread, or with croutons.  I like to add a splash of chilli sauce – “Dave’s Devil Juice” – which is a recipe I also need to post this weekend.

UPDATES 30 APRIL 2017

I spent most of today making another batch of this soup – possibly for the first time in two years… Made 2 changes to the process:

  1. Instead of putting the browned bones back into the soup, I put them and the browned trimmings into a separate pot with a whole pile of vegetable trimmings and herbs, and made a new batch of stock.  After straining and reducing it, I used that stock in the soup.
  2. I did not brown the meat cubes, but rather added them into the vegetables with the stock.